Scenery for Wargaming and Role Playing
By Slim Mumford
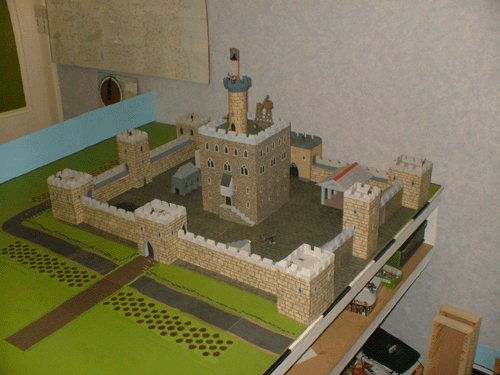
Real castles come in a vast variety, depending on the geography of the site, the threat faced, the numbers to be protected, and the fashions in the periods of construction. With wargames castles another factor emerges, that of providing interesting siege actions. In role-playing however, a castle or fortified town may just be the backdrop to a story. In either case or in real life there are certain fundamental requirements.
1. The inhabitants need access from the outside meaning one or more gates. Thought may be given to the provision of sally ports or sortie gates.
2. The access routes into towers and up onto wall-walks need to be placed logically,
favouring the needs of the inhabitants whilst sometimes making life difficult for any
attackers.
3. Thought should be given to the placing of wells, or other water sources, food stores
and stabling facilities.
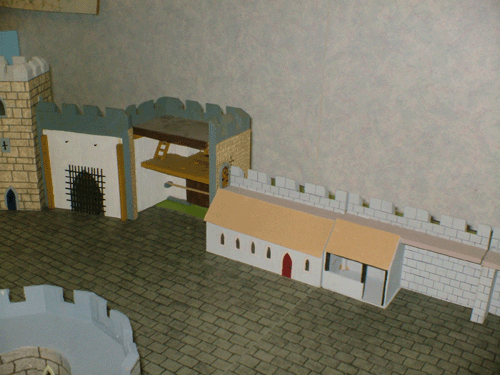
4. A Church or Chapel (or temple?) is found in almost all castles. For wargames
purposes these make the obvious ‘cowards refuge’ to which routed troops will flee.
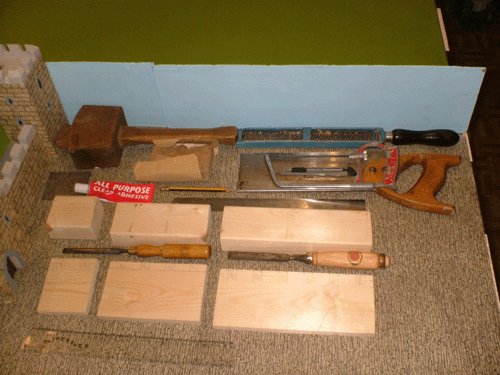
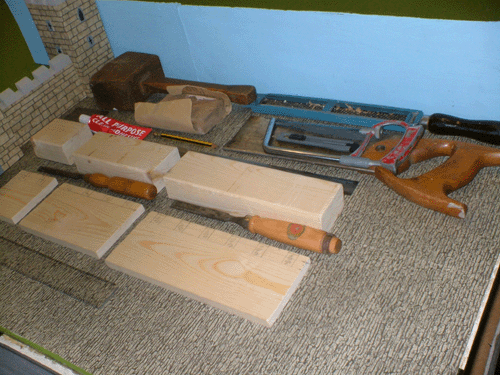
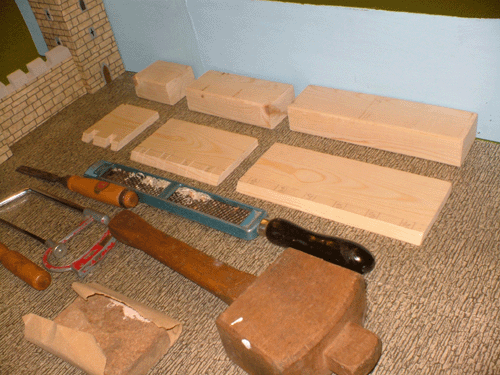
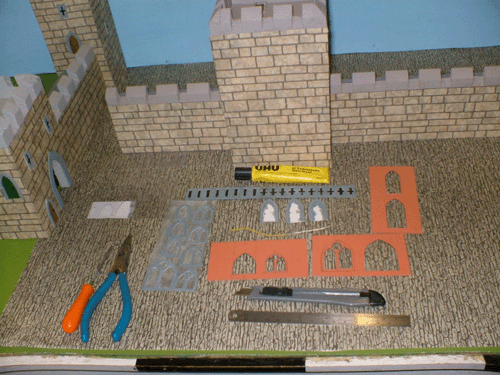
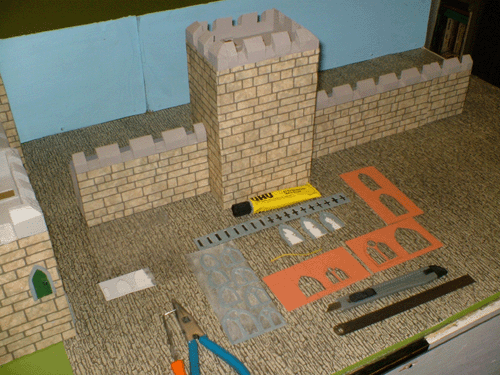
Materials: 93 x 11mm and 63 x 38 finished deal timbers, stout and fine pieces of cardboard, glue, paste & stone paper (optional) and paints. Plus fuse wire for the door handles.
Tools: Tenon Saw, Hack Saw, Surform, Cutting Board, rulers & setsquare, pencils, craft knives, chisels, mallet, paintbrushes and small pliers.
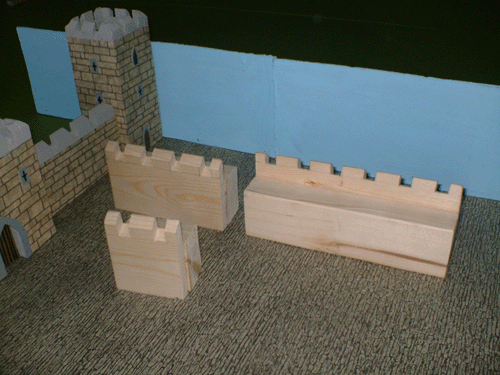
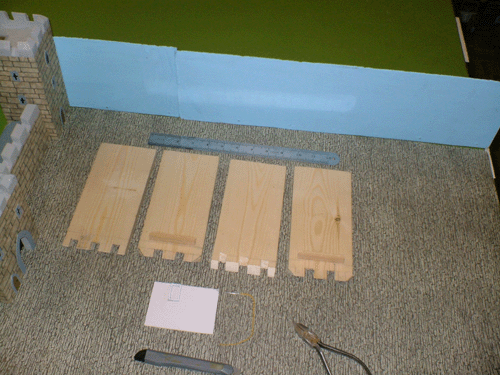
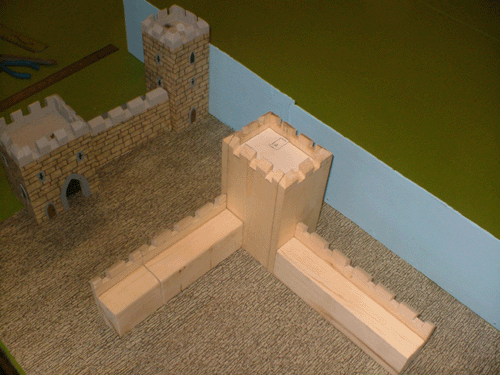
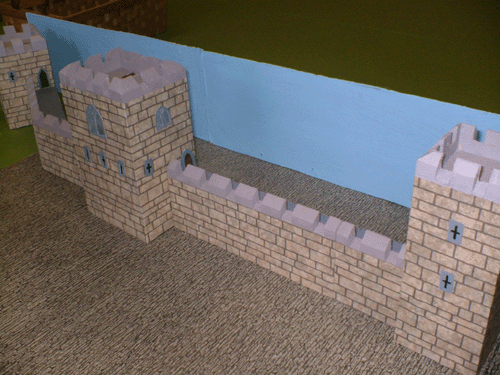
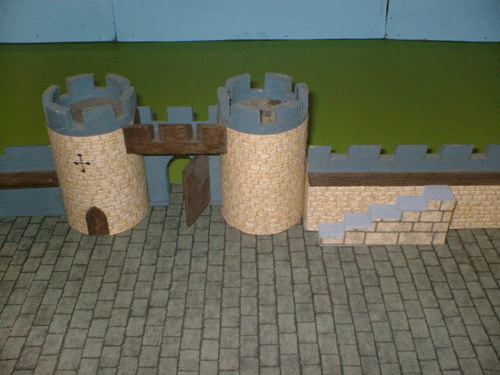
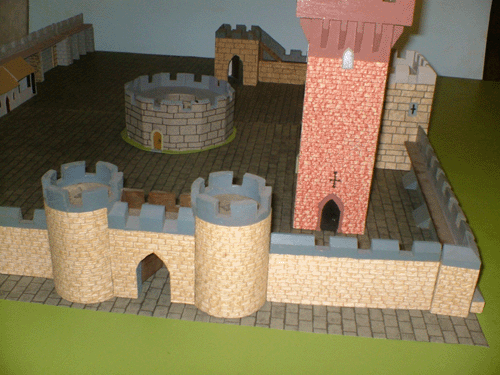
Medieval castle and town defensive walls were thick so to keep roughly in scale I use pieces of timber bought from DIY outlets. My early fabrications designed for Airfix figures involved walls nominally three inches (actually 95mm) high with parapets three quarters to one inch wide. The enlargement of figures and their cumbersome slotta bases means that larger sizes are required. My current walls are made from lengths of timber 93mm wide by 11mm thick. The parapets to back them are 63mm wide by 38mm thick. I use half inch (12mm) crenellations with one inch between each. Thus with multiples of one and a half inches most of my wall sections are six inches, nine inches or twelve inches long. For a complete set of fortification walls a few external and internal angled sections may be thought desirable plus a couple of right-angled ones for angles where there is no tower. Mostly these would be against water obstacles or atop cliffs.
For the walls example I have made a three-inch, a six-inch and a nine-inch section of battlemented wall. Having cut the requisite length of timber with a tenon saw the next step is to mark out the crenellations allowing for sloped merlon tops and appetures. Even though much of the marking will be removed when one bevels the top it is easier to do the marking at this stage. Next one uses a plane or a surform to provide the necessary slope. Then I cut the sides of the appetures with a hacksaw, removing the surplus timber with a chisel. Once the front intricate part of the wall is made it is easy to glue it to the parapet backing pieces. Then the sections are panted and in my case have expanses of doll’s house stone paper glued to them. Obviously finishes far better than mine can be created if desired. As I mention elsewhere I aim for cheap and cheerful mass production. The paint I use for fortifications are mixtures of cheap decorators emulsions.
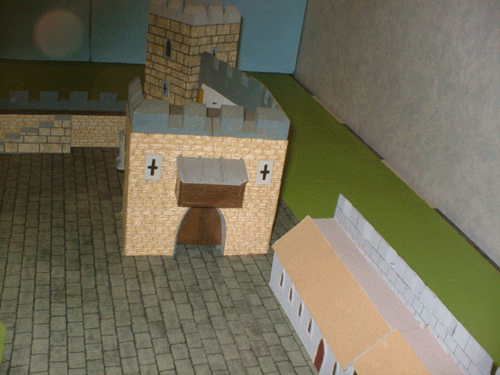
For the tower example I have made a three and half inch by four and half inch three story tower. First cut four eight-inch lengths of 93 x 11mm timber. Then mark the crenellations allowing for the sloped merlon tops as with wall. Two sides will have two appetures and the other two three. Then as before bevel the tops and chisel out the appetures. (It is a good idea to save the waste chippings from this as they can be used for improvising rubble in ruined building models.) The floor of fighting top I make out of thick card supported upon two pieces of scrap wood glued to the tower walls. With the timber being so thick, reinforcing inside is not necessary. The trap door, doors, arrow slits and windows are cut from thin card. Though these can be glued on permanently, having them loose so they can be attached with blu-tack allows for more variety of use. Wall towers may be accessed from either the ground or from the parapet. If this tower is used on its own it may be best to have the door up a set of wooden steps to make battering with a ram difficult. Then whilst most constables will prefer arrow slits, in reality windows the lighting advantages of windows is helped by it being possible to throw handstones out of them. Of course in the Middle Ages glass was a rarity in castles, the windows having thick wooden shutters instead. Glass windows could be protected with brattices of iron bars, to prevent people climbing in or out.
|
|
|
|
|
|
|
|
|
|
|
|
|
|
Scene 2 Dark Ages & Medieval Village buildings
Scene 4 Medieval City Buildings
Scene 5 Temples and Eastern Buildings
Scene 6 Half Timbered Buildings & Palisade defences
Scene 7 Castles & Town fortifications